How to set up a local development environment (LDE) for Drupal
You are probably interested in setting up a workign environment for Drupal-based projects or maybe you have new members in your development team, so the configuration of the correct development environment is a fundamental part of the process of working with Drupal, you are right. By reading this how-to guide, you will implement a complete and ready-to-go Drupal working environment ready for versions 8, 9, and 10 of our favorite CMS/framework. Do you want to start?…
Picture from Unsplash, user Mathyas Kurmann, @mathyaskurmann.
This content has been constructed as a “how-to” guide, based on the Diátaxis approach for How-to guides, described by Daniele Procida.
Index of sections
- Introduction
- What you will accomplish
- Software requirements
- Set up a lightweight local environment for PHP
- Set up an IDE for Drupal development
- Tip: create Drupal 10 sites on the fly in your environment
- :wq! - Recommended song: Van Moustache - María La Portuguesa
Introduction
A local development environment (or “LDE” for short) refers to the combination of software and hardware configurations necessary to develop software comfortably and productively. This includes operating systems, software for programming (IDE), programming languages, frameworks, and versioning systems.
The configuration of an appropriate local development environment is related to the developers’ programming experience, influencing processes such as on-boarding or context-switching adaptations (when you go from programming in one language to working with another technology). As you can imagine, properly configuring LDE is necessary and very important.
This is even more critical when working with tools that already have a complex learning curve, just as in the case of Drupal: facilitating a local working environment is a key to starting work. Following this article, you will set up a complete LDE for Drupal, ready to use, and start your work. Happy Hacking!
What you will accomplish
Through the implementation of the steps recommended in this article, you will achieve the following goals:
- You will build a ready-to-go work environment.
- You will deploy Drupal projects based on Docker containers in LDE.
- You will commit code that meets quality standards from your IDE to a remote repository.
Specifically, you will have correctly configured the following environments:
- A lightweight local environment.
- A heavyweight local environment based on software virtualization (containers).
- An Integrated Development Environment (IDE) with all the necessary configurations to develop good quality code.
Software requirements
Although there are no software requirements, there are operating system requirements. This how-to guide works on Ubuntu systems, specifically 20.04.6 and 22.04.1 (both LTS) and WSL, the Windows subsystem for Linux.
To find out your current version of Linux / Ubuntu, access the terminal and run:
lsb_release -d
This will return the description of your current version:
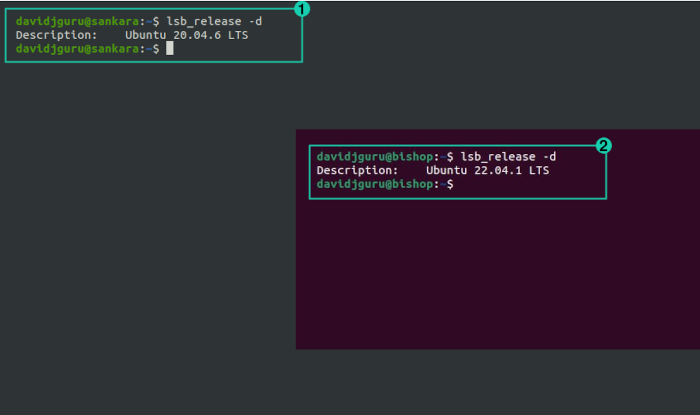
As you can see in the image above:
lsb_release -d, getting Ubuntu 20.04.6lsb_release -d, getting Ubuntu 22.04.1
Set up a lightweight local environment for PHP
While all Drupal development relies nowadays on software virtualization environments (containers), some organizations require at least the installation of some basic PHP resources for complementary tasks, such as file validation or the execution of some functions from the terminal out of containers.
This implies a minimal installation on the host system. Specifically, you will install only PHP CLI, the command line tool that allows you to execute PHP scripts.
Drupal 10 requires at least PHP 8.1, so you will have to execute different steps in Ubuntu 22.04.3 and Ubuntu Ubuntu 20.04.6.
Get start
To install PHP CLI in Ubuntu 22.04.3, follow these steps:
Update system dependencies:
sudo apt updatesudo apt upgradeInstall the available package for PHP 8.1, but avoiding dependencies such as Apache and other unsolicited default packages:
sudo apt install --no-install-recommends php8.1Install some basic PHP extensions:
sudo apt-get install -y php8.1-cli php8.1-common php8.1-zip php8.1-gd php8.1-mbstring php8.1-curl php8.1-xml php8.1-bcmath
Now, it’s time for the basic installation of PHP on an older LTS version of Ubuntu. In this case, the PHP version available in the official repositories is still PHP 7.4.3, so to align it to the versions required by Drupal 10, we will have to make some adjustments.
To install PHP CLI in Ubuntu 20.04.6, follow these steps:
Update system dependencies:
sudo apt updatesudo apt upgradeYou will use the reference repository of Ondřej Surý for PHP versions, so add a new “Personal Package Archive” (PPA) as a new available repository in your system:
sudo add-apt-repository ppa:ondrej/phpsudo apt updateAnd press ENTER when prompted.
Now install the required PHP versions:
sudo apt install php8.1Finally, install some basic PHP extensions:
sudo apt install -y php8.1-cli php8.1-common php8.1-zip php8.1-gd php8.1-mbstring php8.1-curl php8.1-xml php8.1-bcmath php8.1-sqlite3
The purpose of these lightweight installations of PHP resources in the local environment is to serve as an “extra tool” for working with PHP files.
Check your installation
Now, you must perform some basic checks to confirm that everything is working well. To test your local PHP installation, follow these steps:
Check your PHP modules installation:
php -mThis will return a complete list of PHP and Zend modules installed on your systen, including basic resources as
gd(image graphics library),mbstring(multibyte enconding) orZend OPcache(objects cache).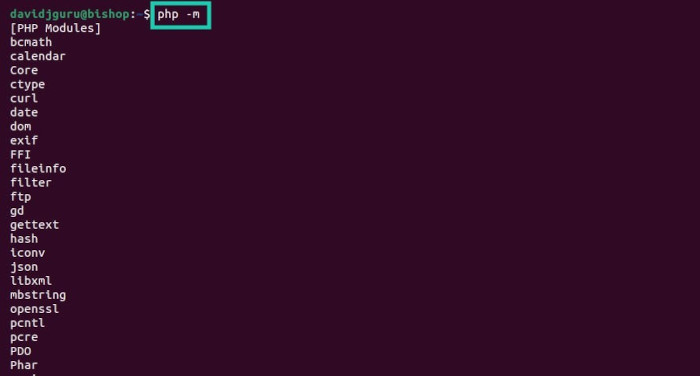
Create a simple PHP file:
cat > phpinfo.php
<?php
  phpinfo();
?>
And exit from text editor typing CTRL+D in prompt.
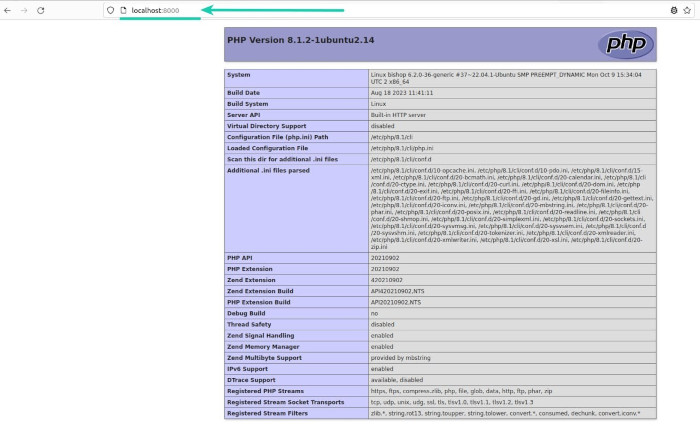
Execute the PHP file using the PHP built-in web server:
php -S localhost:8000 phpinfo.phpOpen the URL in your favourite browser and get data from your PHP local installation:
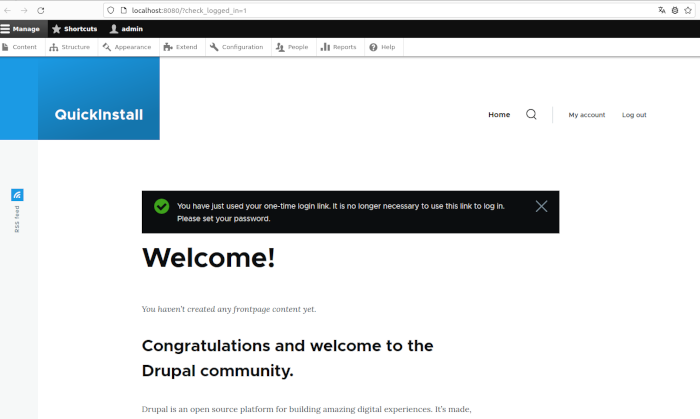
Prepare an on-the-fly Drupal installation following the steps recommended in the Quick Start documentation:
curl -sSL https://www.drupal.org/download-latest/tar.gz | tar -xz --strip-components=1You may encounter permissions issues from the execution of
tarcommand running the above recommended command. In that case, try running it:wget -c https://www.drupal.org/download-latest/tar.gz -O - | sudo tar -xzBut you will need to change owner and permissions for the new folder:
sudo chown -R $USER:$USER drupal-*sudo chmod -R 775 drupal-*Launch a Drupal installation:
cd drupal-*php -d memory_limit=256M ./core/scripts/drupal quick-start standard --site-name QuickInstall --host localhost --port 8080Check out the new Drupal site automatically created and available in a tab of your preferred web browser:
For more information about the PHP built-in web server, read the PHP documentation page.
Set up a heavyweight local environment based on software containers
Now, it is time to prepare installation of a suitable local working environment related to the trend established in recent years: container-based (Docker and related resources). For this, we will install Docker as the base system for container management, and on this platform, we will install DDEV.
As for Docker, in 2023-2024, there is little left to say: the de-facto standard for software virtualization based on the concept of “containers” and the base concept for other DevOps technology stacks currently in extensive use.
We have already talked about DDEV in other articles, posts, tutorials and how-to guides: a solution running on Docker for PHP-based web platforms that facilitates the execution of projects (previously existing and new ones). Why DDEV? Compared to other container-based tools such as Docker4Drupal, Lando, or Docksal, DDEV has recently gained significant support from the Drupal community, which makes it almost already the chosen option for development.
Read more about DDEV as solution:
- About how DDEV works, read “Creating development environments for Drupal with DDEV”.
- About DDEV reading materials, read “Books: Local Web development with DDEV (Review)".
- About DDEV installation, read the “DDEV documentation”.
- About how to develop a Drupal site on your local machine using Docker and DDEV, read “How To Develop a Drupal 9 Website on Your Local Machine Using Docker and DDEV (Digital Ocean)".
- For a quick cheatsheet (and nowadays slightly outdated), read: Tooling: Docker Docker-Compose DDEV - Cheatsheet.
Get start
To install Docker and DDEV in your local environment, follow the next steps:
Install Docker and its resources:
sudo apt updatesudo apt -y install docker-ce docker-ce-cli containerd.io docker-buildx-plugin docker-compose-pluginAdd DDEV’s GPG key to your keyring:
curl -fsSL https://pkg.ddev.com/apt/gpg.key | gpg --dearmor | sudo tee /etc/apt/trusted.gpg.d/ddev.gpg > /dev/nullAdd DDEV releases to your package repository:
echo "deb [signed-by=/etc/apt/trusted.gpg.d/ddev.gpg] https://pkg.ddev.com/apt/ * *" | sudo tee /etc/apt/sources.list.d/ddev.listNow update info and install DDEV:
sudo apt updatesudo apt install -y ddevConfirm the installation of the software by checking version:
ddev -vYou will get from prompt something like:
ddev version v1.22.1
Check your installation
To test your local DDEV installation, follow these steps:
Create a new Drupal 10 site:
Prepare the main folder:
mkdir drupal10-site && cd drupal10-siteEnable the basic configuration for the site:
ddev config --project-type=drupal10 --create-docroot --docroot=webInit the DDEV container ecosystem:
ddev startBuild the new site downloading basic resources and executing the installation:
ddev composer create drupal/recommended-project && \
ddev composer require drush/drush && \
ddev drush site:install --account-name=admin --account-pass=admin -y
Finally, launch the new Drupal site:
ddev drush uli | xargs xdg-openYou can run a DDEV command to show the site:
ddev launch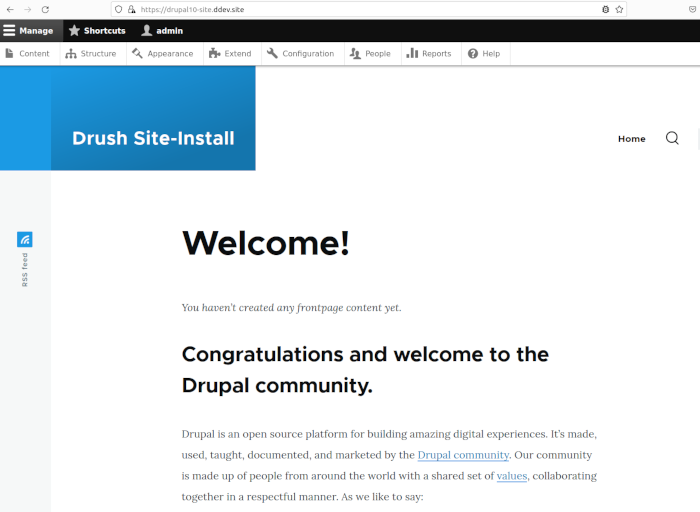
Set up an IDE for Drupal development
As a third step, you will install an integrated development environment (IDE). An IDE is a fundamental tool for software development, and in the case of Drupal, you will have to make some adaptations to work with its code.
In this scenario you will work with VSCode, Microsoft’s IDE tool released as Open Source that has a 100% free alternate build (VSCodium, which does not integrate Microsoft’s usage telemetry).
You will install the IDE on Linux (Ubuntu / Debian-based) and then you will make the necessary configurations and custom changes. In order to prepare an IDE in your local environment, follow the steps below:
Get start
To have a fully functional environment, follow the steps below.
Install VSCode
- Download VSCode for your OS (Ubuntu / Debian based) from https://code.visualstudio.com/download.
- Move to your Downloads folder and install the
.debfile:cd ~/Downloads sudo apt install ./<file_name>.deb
Install XDebug
Open your VSCode installation and launch VSCode Quick Open (Ctrl+P).
Install the PHP Debug extension for VSCode typing the next command in the new box and press enter:
ext install xdebug.php-debug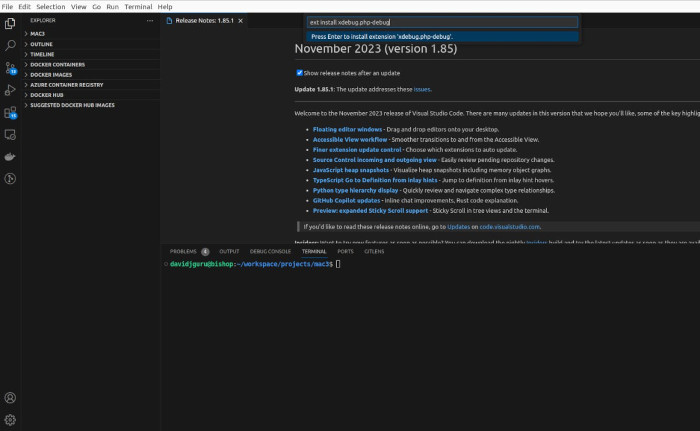Prepare a
launch.jsonfile per project’s folder, including the lines for Xdebug connections:{ "version": "0.2.0", "configurations": [ { "name": "Listen for Xdebug", "type": "php", "request": "launch", "hostname": "0.0.0.0", "port": 9003, "pathMappings": { "/var/www/html": "${workspaceFolder}" } } ] }Enable XDebug in ddev, just run:
ddev xdebug onNow you can enable the debug mode by clicking in option “Run and Debug”, then put some breakpoints whitin the source code and try to run the site. You are ready for debugging.
Install PHP Codesniffer (PHPCS)
PHP CodeSniffer (PHPCS) is a pair of scripts (phpcs and phpcbf) to detect violations and perform automatic repairs of coding standards. This integration requires some tasks:
Install PHPCS as a resource in DDEV containers:
ddev composer require --dev drupal/coder dealerdirect/phpcodesniffer-composer-installerVerify PHPCS has been installed in your DDEV-based Drupal site:
ddev exec vendor/bin/phpcs -iYour should see something like:
The installed coding standards are MySource, PEAR, PSR1, PSR2, PSR12, Squiz, Zend, Drupal, DrupalPractice, VariableAnalysis and SlevomatCodingStandardThis is the list of coding standards enabled for code sniffing.
Enable version control in project root (if not already done) and create a new folder for scripting:
cd $PROJECT_ROOT
git init
mkdir -p scripts/git/pre-commit
Create a new pair of scripts in the folder,
pre-commitandpre-commit-phpcs.phpwith content:#!/bin/sh # Run pre-commit check PHP script inside ddev when committing from host. if [ "$IS_DDEV_PROJECT" != true ]; then ddev exec /usr/bin/php scripts/git/pre-commit-phpcs.php else /usr/bin/php scripts/git/pre-commit-phpcs.php fiand:
<?php

/**
* @file
* A Git pre-commit script to check files for PHP syntax errors.
*
* Requires a properly configured phpcs.xml in your codebase.
*
* Inspired from https://www.drupal.org/project/dcq
* and modified for Drupal 8+ and for running **inside** DDEV.
*/

$exit_code = 0;
$files = [];

// Determine if is the first commit or not.
exec('git rev-parse --verify HEAD 2> /dev/null', $files, $return);
$against = ($return == 0) ? 'HEAD' : '4b825dc642cb6eb9a060e54bf8d69288fbee4904';

// Identify changed files.
exec("git diff-index --cached --name-only $against", $files);

print "\nPrecommit PHPCS\n\n";

foreach ($files as $file) {

if (file_exists($file) && !is_dir($file)) {

   // Perform PHP syntax check (lint).
   $return = 0;
   $lint_cmd = "php -l {$file}";
   $lint_output = [];
   exec($lint_cmd, $lint_output, $return);
   if ($return !== 0) {
      // Format error messages and set exit code.
      $exit_code = 1;
   }

   // Perform phpcs test.
   $return = 0;
   $phpcs_cmd = 'phpcs ' . $file;
   $phpcs_output = [];
   exec($phpcs_cmd, $phpcs_output, $return);
   if ($return !== 0) {
      // Format error messages and set exit code.
      echo implode("\n", $phpcs_output), "\n";
      $exit_code = 1;
   }
}
}

exit($exit_code);
Connect PHPCS with git commits to perform code reviews before submitting to repository.
chmod +x scripts/git/pre-commit
cd .git/hooks && ln -s ../../scripts/git/pre-commit
Now, every time you commit a new change, git will identify the newly modified files and if applicable (within the PHPCS configuration rules), it will perform a code review, giving you feedback.
Add new configuration rules for PHPCS:
Create a new PHPCS config file in root folder, the newphpcs.xml.distwill contain:<?xml version="1.0" encoding="UTF-8"?> <ruleset name="drupal_website_development"> <description>PHP CodeSniffer configuration for Drupal website development.</description> <arg name="extensions" value="yaml,yml,php,inc,module,install,info,test,profile,theme,css,js"/> <arg name="report" value="full"/> <arg value="p"/> <arg name="colors"/> <!--Include custom code.--> <file>RoboFile.php</file> <file>web/modules/custom</file> <file>web/themes/custom</file> <!--Exclude third party code.--> <exclude-pattern>./.ddev</exclude-pattern> <exclude-pattern>./vendor</exclude-pattern> <exclude-pattern>./web/core</exclude-pattern> <exclude-pattern>./web/libraries</exclude-pattern> <exclude-pattern>./web/modules/contrib</exclude-pattern> <exclude-pattern>./web/themes/contrib</exclude-pattern> <exclude-pattern>./web/sites</exclude-pattern> <!--Exclude Drupal generated config files.--> <exclude-pattern>./config</exclude-pattern> <rule ref="Drupal" /> <rule ref="DrupalPractice" /> </ruleset>
The new file will provide the basic enabled rules for PHPCS. You can find more inspiration and examples in others phpcs.xml.dist files, such as the one in the Drupal core, path web/core/phpcs.xml.dist. Don’t forget to put this new file under git control and commit it to repository.
- Read more tutorials and guides about configure Xdebug in differents tools.
- Read more about launch configurations in VSCode: code.visualstudio.com/docs/editor/debugging#_launch-configurations.
- Read more about how to configure Xdebug in VSCode for DDEV: ddev.readthedocs.io/visual-studio-code-vs-code-debugging-setup.
- Read more about advanced usage of PHP Codesniffer: PHP_CodeSniffer/wiki/Advanced-Usage.
- Read more about recommended extensions for Drupal in VSCode: www.drupal.org/recommended-extensions-for-drupal.
Tip: Create Drupal 10 sites on the fly in your environment
Create bash functions to launch Drupal 10 web sites on the fly from your terminal. Now you can reuse common steps to save repetitive tasks in your system, for example creating new Drupal 10 sites to test features.
To create Drupal 10 websites in an automated way, follow the steps below:
Stop Apache in your environment, this will free port 80:
/etc/init.d/apache2 stopCreate (if it does not exist) a
.bash_functionsfile in your home directory:vim ~/.bash_functionsAdd a specific block with some bash commands, gathering all the related DDEV commands to create a new Drupal 10 site:
## Creating Drupal projects by using DDEV.
d10ddev () {
  # If you don't provide a name the script will get one random for the site.
  if [ -z "$1" ]
  then
      check=$(shuf -n1  /usr/share/dict/words)
      shortened=${check::-2}
      varkeyname=${shortened,,}
  else
      varkeyname=$1
  fi
  # Create main project folder.
  mkdir $varkeyname && cd $varkeyname
  # Prepare basic configuration.
  ddev config --project-type=drupal10 --docroot=web --create-docroot
  yes | ddev composer create "drupal/recommended-project:^10"
  # Require some extra Drupal resources.
  ddev composer require drush/drush drupal/admin_toolbar drupal/devel drupal/coffee
  ddev composer update --lock
  # Execute site install.
  ddev exec drush si --site-name=$varkeyname --account-name=admin --account-pass=admin -y
  # Enable modules and clean cache.
  ddev drush en -y admin_toolbar admin_toolbar_tools admin_toolbar_search admin_toolbar_links_access_filter devel devel_generate coffee
  ddev drush cr
  # Start the new site and open it in browser.
  ddev start && ddev launch
}
Edit your main
.bashrcfile and make sure you have a block like this (if not, add the lines):# Alias definitions. # You may want to put all your additions into a separate file like # ~/.bash_aliases, instead of adding them here directly. # See /usr/share/doc/bash-doc/examples in the bash-doc package. if [ -f ~/.bash_aliases ]; then . ~/.bash_aliases fi if [ -f ~/.bash_functions ]; then . ~/.bash_functions fiSource the .bashrc file to make the changes take effect:
source ~/.bashrcNow you can create new Drupal 10 sites on the fly, just run:
d10ddevTo delete dummy Drupal sites, just add a new fuction in the
.bash_functionsfile:## Destroy enabled Drupal site based in DDEV by name from project folder. ddevdestroy () { varkeyname=${PWD##*/} ddev stop yes |ddev delete -O cd .. rm -rf $varkeyname }This will stop the containers network, destroy the DDEV containers and finally delete the source code from the project folder.
Get some examples of bash scripting for day-to-day use in Drupal / DDEV based projects here in Github.
Read more about how to customize bashrc files.
:wq!
That’s it! congratulations, if you have followed all the steps in this how-to guide, then you have completed a local development environment for Drupal. I leave you with a final song, which you can find in the Spotify playlist “The Russian Lullaby”.
See you!